So many questions
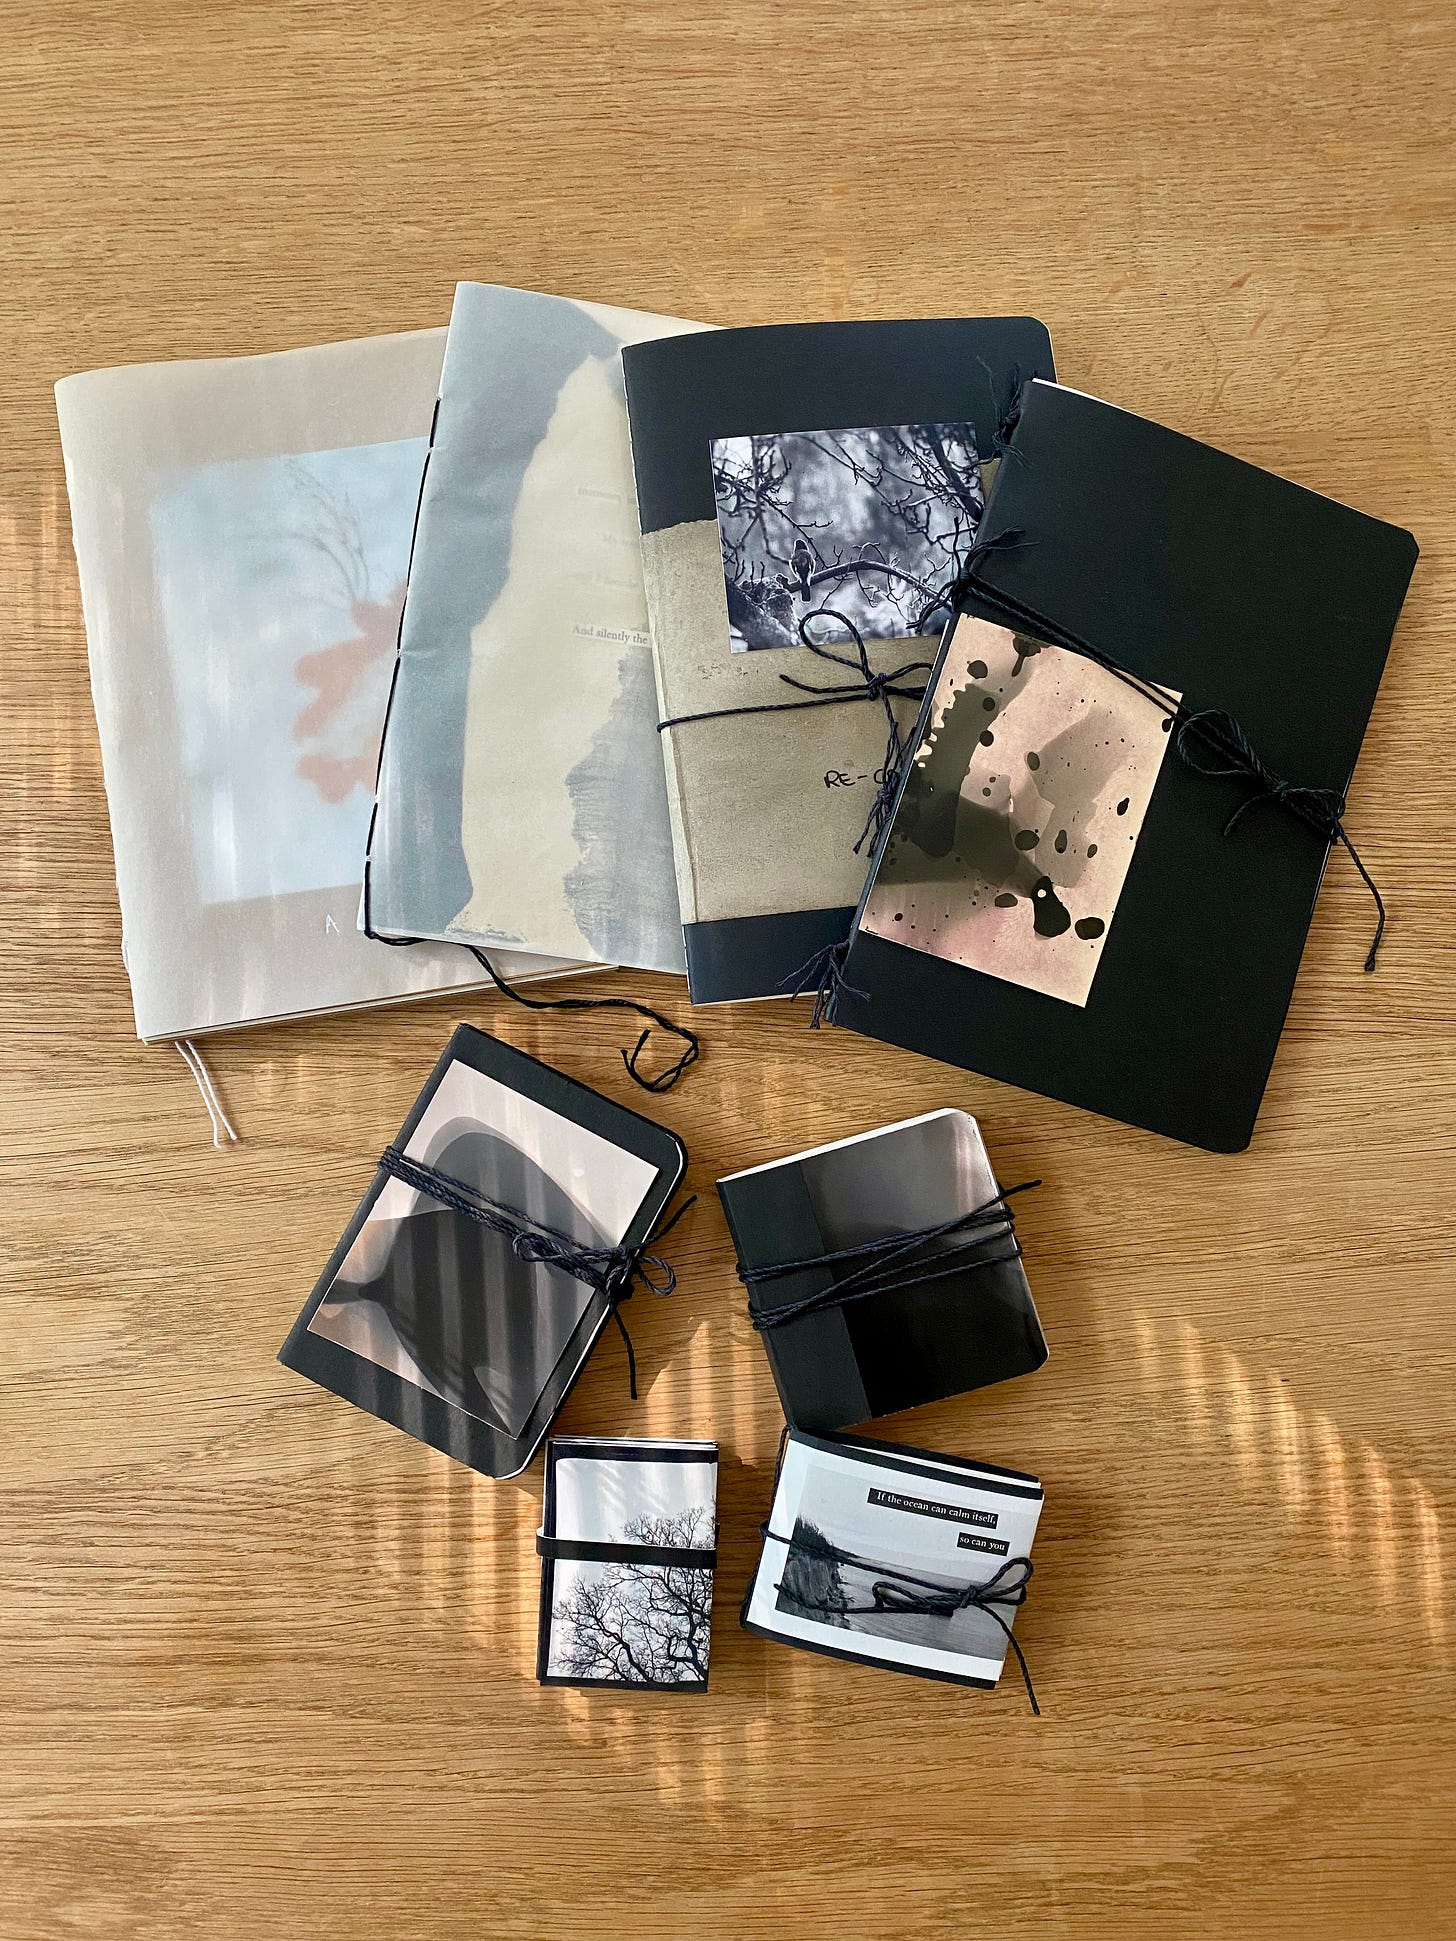
Answering your questions about my process making zines.
Today’s newsletter is so long (My apologies!) that it might be truncated in the email. Please click on "View entire message"
If you have read my newsletter two weeks ago, you will know that I have been getting a lot of questions about my handmade zines and booklets that I shared with the Substack community. A lot of you have been asking if I could write more about my process of making these. This is why I decided to write about this today and try to answer your questions.
But here is a disclaimer: You won’t find any tutorials here. I am happy to share my process, my sources of inspiration, talk about the experiences I had along the way and maybe write down a few thoughts about my Why’s and How’s regarding zines. I am not an expert. Neither in photography nor in book or zine making. I have gathered some knowledge and experience over the years -which I am happy to share- but it is only one way (my way) to work. It might not work for you. But I hope you will find some answers, a bit of inspiration and a ton of motivation to start your own little project. That being said, let’s dive into your questions.
Where does your inspiration come from?
It sounds a bit bland, but I find inspiration in all kinds of situations. Sometimes, it is a certain question or topic I would like to explore. Then I go out and make photos around that. Other times, I already have photos and feel they belong together because they tell a certain story. To give you an idea of what I am talking about, here are a few examples:
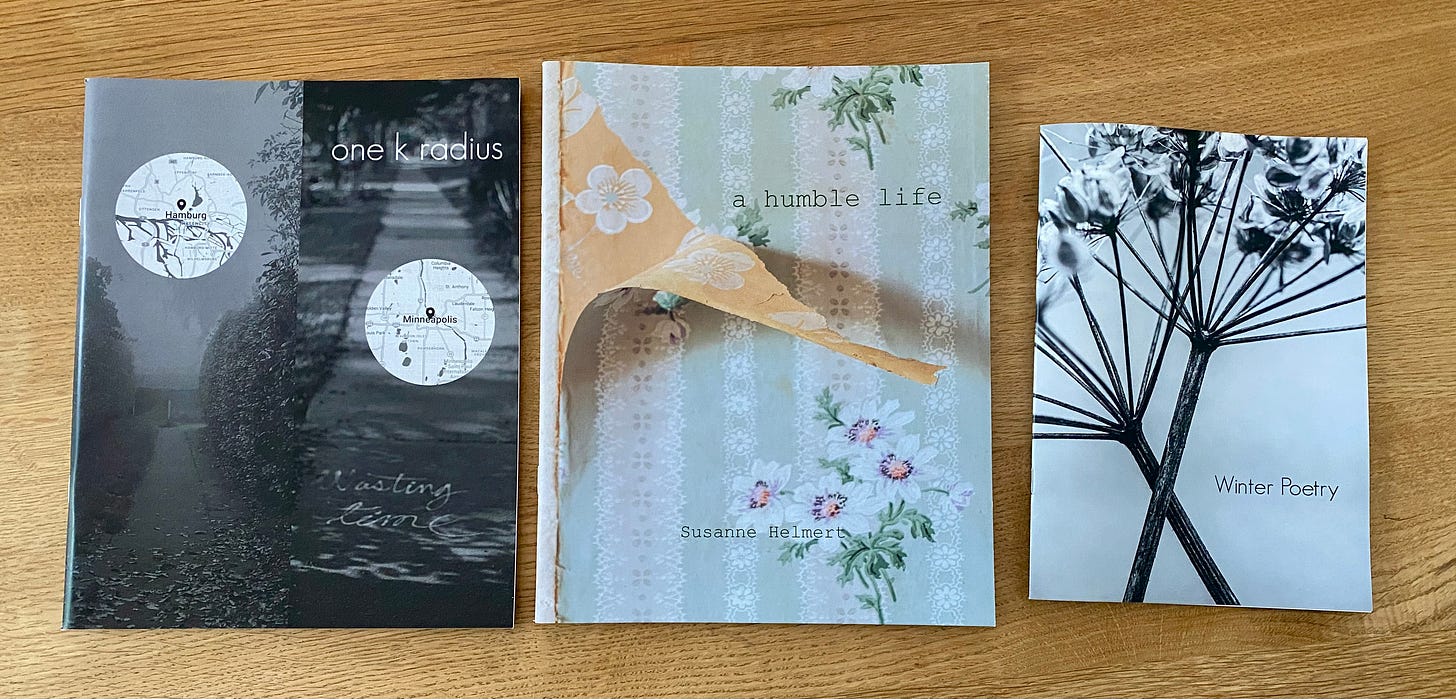
A few years ago -while living in the US- I photographed a lot of abandoned buildings. And in these buildings there was almost always a lonely chair in one of the rooms. So, I made a photo of it. And another one in a different location, and another one. There was something about these chairs that moved me. At one point, I decided to make a series out of them which eventually turned into a booklet. You can read more about it here:
Another project that evolved out of my long-term project of photographing abandoned buildings on the Great Plains was a zine I published just a few months ago. I didn't know it would turn into a project when I made these photographs. But being in this house, learning about its former resident made something with me, and I wanted to turn it into some special.
A very spontaneous idea for a zine came to me last year. Winter had just arrived and everything was covered with a white blanket of snow. I was so thrilled (I love snow!) that I grabbed my camera and went out to enjoy the snow and make some photos. At home, I still felt so much joy and excitement, that I wanted to create a little memento of this beautiful day.
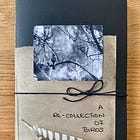
Another example of a rather spontaneous and unexpected idea for a zine came when I was looking at photo books. They are a huge source of inspiration for me. Not only for a theme but you can also learn a lot from them about storytelling, sequencing photos. Anyway, I was looking at a series of books that were mostly about birds and that made me think of my own encounters with birds and the photos I had made of them. So, I dived into my archive and created this zine:
How do you know it’s time for a zine or another creative project?
As silly as this may sound it’s often my photography that tells me to make something out of it. And zines are the perfect medium. For books, you usually need a much bigger volume of photographs to choose from and work with than for a zine or booklet. Also, making a book is much more intimidating to me than creating a zine (let alone the costs). I love photo books for many different reasons, but zines are great for smaller projects.1
Looking at printed photographs is a different experience for me than looking at them on a screen. That is why I like printing photos and creating zines. It is a little bit like the family albums we used to make back in the day with photos from vacations, or family gatherings, Christmas etc. Just with a different idea or motivation behind it.
I often make a zine or booklet just for the sake of creating something with my hands or to practice the different elements that are involved in making a zine: curating photos, sequencing them, deciding on layout and design, printing, and binding a zine. I can’t recommend this highly enough. Practice is really the key here.
How do you start?
Considering that I already have my idea or theme and my photos sorted out, I usually print (or have them printed at the local drug- store) small versions of the photos I want to use. Another early step in the process is to think about the layout and format - especially if you want to have your zine printed professionally you need to figure out what the company is offering (what kind of paper, which formats etc.).
If you want to make a handmade zine you still have to make these decisions but you usually have more options when it comes to these questions. My one-of-a-kind handmade zines are often made with materials I have at home in my studio. I often just use Din A4 (letter size) paper and fold it in half. This way I don’t have to cut it. But exploring other formats is fun too.
What about selecting and sequencing your photos?
I start with a much larger selection of photos than I intend to use for the final zine. I will lay them all out on a big table and will look at them. Sometimes I immediately find pairs that work together as a double spread or single photographs I really want in the sequence or I have found some that won’t work at all, so I will set them aside. If possible (this depends on the amount of photos I work with), I will start to lay them out in a sequence or an order I think could work.
After having spent some time with the photos I will take a break -which can be days, sometimes even weeks - before I come back to them and repeat the step. Stepping away helps me to get some distance and a clearer idea of what works and what not. I will repeat this procedure until I am satisfied with the flow of the sequence and how the photos interact with each other.
The sequencing can be done in many different ways and depends on the narrative (if there is one) of the zine. The photos can be paired by colour, similarities or content, following a timeline in which the photographs were taken or just by pure feeling. It all depends on what the story is all about and how you want to tell it. So, there unfortunately is no easy answer to this. For me, it is the part of the process that is the most time intense and difficult but also the most exciting one. A process that definitely shouldn't be rushed.
How long does it take to produce a zine?
That highly depends on what I am making. If I am creating just one of my handmade zines with only a few pages and no intention of selling it or showcasing it, it’s a couple of hours -from picking photos to having the final zine in my hands. Is it something, that I create to have printed professionally and maybe with the idea to sell - I will give this much more thought and put much more effort into it. Then it usually will take a few months before I am confident enough to say it’s ready to go to the printer.
What does your workflow look like for a digital version? What software do you use?
This is a topic, I am still working on finding a better solution, at least when it comes to the software. You might find better answers by reading my previous newsletter. But here is what my workflow looks like:
I select the photos in Lightroom.
Then I will get small prints of the photographs I selected because I prefer to do the final selection as well as the sequencing on my table or on the floor. I sometimes stick my final selection between plain pages of pages (ideally in the size I want my zine to be) to get a feeling for the sequence.
Once I am happy with it, I will create my pages in Photoshop. This is not the best and easiest way, but that’s what I have been doing in the past.
Once they are all done, I will send them as a PDF document to my local printer to get my first test zine. Usually, there are a few adjustments to make before the final version is printed. It also can be helpful to have a friend look over the test print to give you some feedback.
Here is a short example:
I had collaborated on a double exposure project2 with another photographer and as a thank you I wanted to send him something. I could have sent him a single photo print or just a short mail, but I wanted it to be something nicer. So, a zine it was.
Because I wanted it to be more personal, I chose a handmade version. The layout needed to be simple and minimalistic. The size not too big, but not too small either, because the photos are quite busy. I wanted quality paper that feels good in the hands but also gives a good quality print.
I had the photos already in my Lightroom catalogue. I marked the ones I wanted to use and used the book-making tab in Lightroom to sequence them.3
I made notes to remember which photo goes on which page in the zine. And then I created all the pages in Photoshop and saved them on my computer.
The paper I used was a Hahnemühle cotton-based photo paper which is printable on both sides. It was Din A4 which cut in half before printing. I then printed all the pages out and laid them all on top of each other so they were aligned perfectly. For the binding, I measured and marked where the holes for the stitches would go and used a needle to make the holes. I used black thread which is a bit thicker and started binding the pages together.4
Here is the result:
How would you do this using non digital equipment?
When I create a handmade zine, I usually start right away with the photographic prints I selected in their final size. I will lay them out, make my selection (if I have more than I want to use), and arrange them in the order I want them to be in the zine. During this process, I usually think about the paper I want to use: this can be anything from plain copy paper, coloured craft paper, water-colour paper or whatever feels right. I will fold or cut the paper into the size I want, stick or glue the photographs onto the pages and either hand-stitch them together or use a stapler to hold the pages together. This process is often a very intuitive and spontaneous one for me.
What is your choice of paper?
If I make a simple handmade zine at home, I will pick what I have on hand and what would work best for the project. If I work with a local printer I am bound to the papers they offer. Most of them offer a small booklet with samples of their papers which is very helpful.
Where did you learn the hand-binding and stitching?
First off I would like to say, my techniques are very basic and not very artful or advanced. I am still working on that. But inspiration and tutorials can be found plenty on the internet. YouTube and Pinterest are my go-to places for that. These platforms are also great places to find ideas for different layouts or if you are looking for ways to fold your booklet differently like these two booklets in the video here.5
Ideas are really lurking in every corner, waiting to be discovered by us. These ideas don’t have to be grand, deep or meaningful and the results don’t have to be breathtakingly beautiful and flawless executed. Especially if it’s the first time making a zine.
In the questions I received, I sensed a lot of insecurities. You might feel overwhelmed by the choices and intimidated by the process. But what I also noticed was a lot of curiosity from your side to give this a try. And that is what I want to encourage you to do. The best is to start with a small simple project or idea. Maybe it’s photos from your last vacation, or you want to do something with all the photos you have of your dog or cat, or something else you enjoy photographing. Pick a colour or a theme and look for photos on your computer that have that colour or fit that theme. The possibilities are endless.
Most of the zines or booklets I have created, I made for myself. This is the best way to simply to enjoy the process, learn something new, and find inspiration for other projects. The internet is full of wonderful creations and can be a great source of inspiration, but in my experience stepping away from the computer and actually creating something gives me more new ideas than falling down another virtual rabbit hole.
And if you have you read this far and still say things like “But I don’t have a good printer.”, “I don’t know how to use Lightroom or software xy.”, or “I don’t have a good project.” - Here is one last example of mine:
While making one of the folded booklets the other day, I thought about the different ways I could use this format for a series of photos that belong together chronologically. A few ideas came up which I jotted down in my notebook.
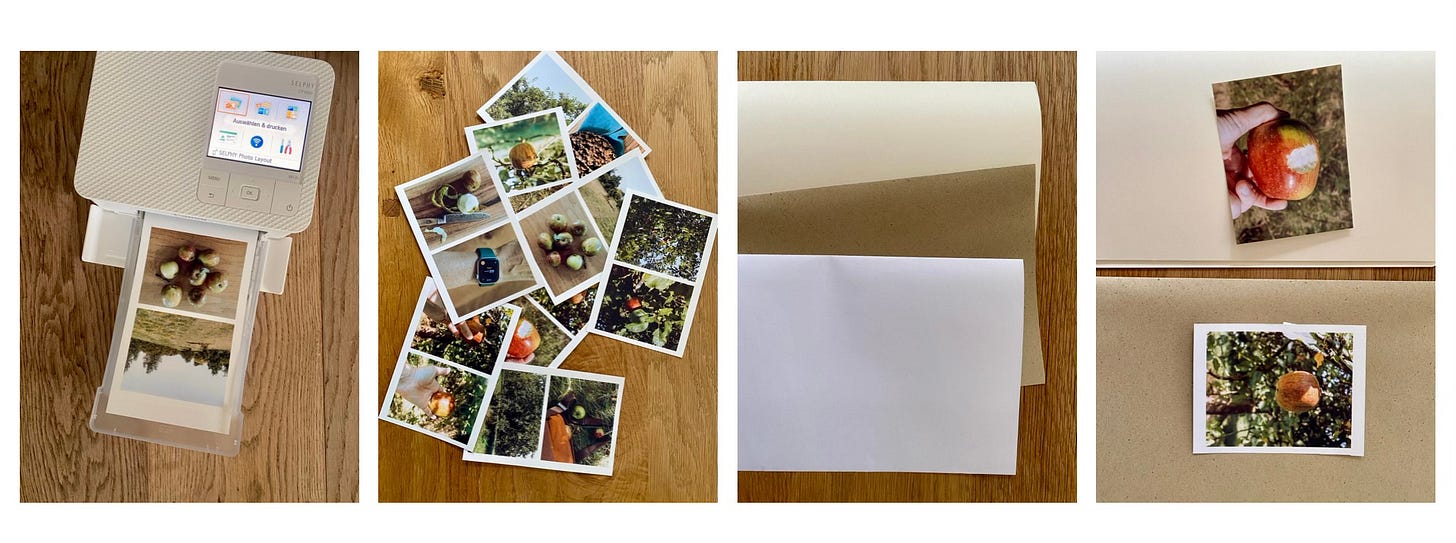
A few days later, I went on a walk with my dog and we passed a wild orchard. The apples were ripe and looked delicious. I immediately imagined how great they would taste in an apple pie. And somewhere between thinking of recipes, eating an apple and making photos I had the idea for a little story which starts in the orchard and ends with the photo of an apple pie. So I made a few photos in the orchard while picking apples, of the apples at home and eventually of the cake (I skipped photographing the messy kitchen part though).
I didn't have many photos to choose from, but enough for what I had in mind. I printed them, using a small portable printer. Then I decided on the paper I wanted to use (white, off-white or brown) and if I wanted to use the photo with or without the white border.
I went with the brown paper. It’s made of grass and I liked the connection (and the color). When it came to the size, I decided A6 would work best with the size of the photos. I then folded and cut my paper and prepared it for binding. I made two holes in each page.

After I had finished the stitching, I taped in my photos and finished the front pages with two leaves of the apple tree.
Most decisions were made along the way. The binding was too loose, so I glued transparent paper on the front cover and all through the back to hold everything together a bit better, but it still wasn’t perfect (see video below). This all took me around 2 1/2 hours.
Phew…
I am sorry about such a long newsletter this week. But I didn't want to write yet another newsletter about the topic in the future. I think you should now have enough information and inspiration to make a zine. And if you make one feel free to share it with me. I would love to see what you’ve made.
That’s it from me today.
Thank you for being here and for reading this week’s newsletter. It means a lot to me!
X,
Susanne
I hope this was helpful. Feel free to share any thoughts, questions or comments with me. I would love to here from you.
Writing these articles for My Morning Muse is fun, but also a lot of work.
If you enjoy reading my weekly newsletter, please consider becoming a paying subscriber. With only €5 per month, your paid subscription helps me writing these articles on a regular basis.
Thank you so much for your support. It means the world to me! ❤️
I wanted try this technique instead of printing them first and laying them out on the table as I usually do.
Here is a video tutorial on how its done.


Wow Susanne, this is fantastic - and what a labor of love, both in the doing of it and your documenting it for us. And what a gift! I also feel like I learned more about you as an artist after reading it. Thank you so much - and I plan to return to this post when I need help.
Gosh this is incredible!